
Build a Scale Model of the Solar System
There are so many models of the solar system available. Some are small and show the basic colors and markings of the planet. Some are much larger where you can paint them your self. They all tend to show the order and some even attempt to show the size difference between the planets (but rarely show the sun in comparison because it is just so huge it will dwarf even the largest planets and make the smaller ones almost invisible). So the kids come away with an idea of what the planets look like and that Jupiter is much bigger than the earth but its hard to grasp the size difference between the earth and the sun and even harder to really understand how big our solar system is.
We are not short on space in our new country home so when my son became fascinated with the solar system I thought. "Why not! Lets attempt to build a to scale model of the solar system" having never seen one myself I looked it up online and found the video of the guys who showed the complete orbits in the dessert. Very cool. But a bit more than I wanted to take on so instead I decided to see what I could do with a 36" balloon for the sun and just demonstrating how far each orbit would be from the sun.
You will need:
String
A container of modeling clay
Two 3" Styrofoam balls
Craft paint/ brushes
5 Dowels (cut in half to make 10 sticks)
Measuring tape
Long Country Road
Optional:
One eye hook
A 36" Yellow Balloon
Solar System Cards
Finding the calculator at Exploratorium was a HUGE blessing. After plugging in my 36" diameter balloon I got the diameters for the rest of the planets. I then multiplied the diameter by Pi (3.14) to get the circumference. (Tell that to all the kids who think they won't ever use geometry after high school!).
Once I had the circumference of each of the planets I measured out a piece of string the correct circumference for each of the planets. Now some of these strings were very small and I had to practice all my fine motor skills to make this work but we got it done.
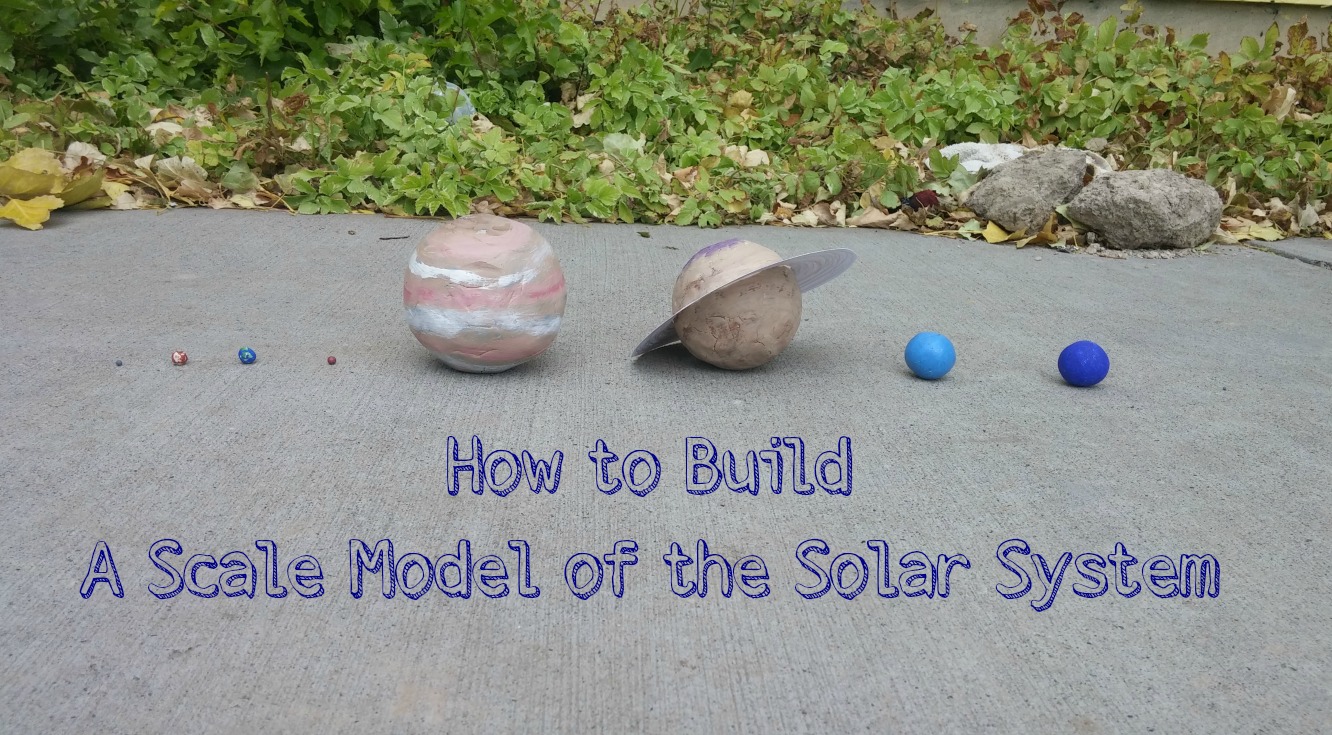
After I had all the strings cut I took out my modeling clay and started rolling balls that looked about the right size and measured and adjusted until I had a ball rolled where the string fit right around the middle. For the larger planets I used a 3" styrofoam ball and built it up from there.
After letting them dry a few days I noticed cracking on the balls I had covered in styrofoam. (the clay had shrunk as it dried) I am not too familiar with the clay medium so I don't have pointers on how to avoid this unless you build the entire thing from clay which would be quite heavy and take a very long time to dry. So as an alternative you could paint a 3" styrofoam ball directly for Saturn and go up to a 4" for Jupiter (Since they don't have a 3.5") or just work with the cracks like we did!

Then I had my 9 year old niece and 11 year old nephew paint the balls while referencing several books and artists renditions. We let them dry overnight before having my husband mount them to half of a dowel rod by either super gluing them to the top or drilling a tapered hole in the bottom and mounting it directly on to the dowel.
The day of our model we invited some friends and set out to measure the distances and mount the planets but when I went to blow up our balloon... it was no where to be found! I laugh now but it was totally disappointing. We ended up drawing a 36" diameter circle in the road instead. If we had the balloon we would have tied it to the dowel rod using an eye hook screwed into the top by hand.
My husband used a measuring tape for the first few planets and his truck's odometer to measure the distances to the larger planets. In all we used up 1.83 miles of a country road to mark them all out. (It would have been 2.41 miles if there had been more road and Pluto was still considered a planet.)

Starting at the sun we walked and stopped at each planet to share what we new about it. I gave out two sets of planet cards to the kids and the laminated 3 part cards for the younger kids to hold up when we reached the planet(s) in their hands. The kids were in awe at how small earth was and how far they had to walk. After Jupiter we hopped into the back of my husbands truck and rode at about 20 mph. The further we went the more the kids laughed in wonder. Which is exactly the kind of "Ah ha!" I love to see as light bulbs go off and imagination ignites.
Here is a video of the the walk/drive stopping to show each planet so you can get an idea of what the distances were like:
All in all it was a bit of work but totally worth it considering we were going to build a model anyway. As my kids get older I'll have them paint the planets, then measure the strings and distances as we do this again depending on where their at with their learning. I think next time I'll make a bigger day of it too borrowing science kits from our local museum and doing "the dance of the planets" where each kid gets to BE a planet and spin in a circle/ walk around the "sun" at different speeds to learn more about the orbits. We did have this cute snack for after the trek which the kids got a kick out of so we'll do that again too.

An alternative to this is going on a space walk if a city near you has one. I know that Anchorage, Alaska has one where you can see the relative size of the planets and their distances set up in downtown and I've heard Portland, OR and Kansas City, KS has one at a park too. So it may be worth looking into in your area.
Bonus:
Just for kicks here is another cool video that shows the solar system to scale with real world reference points.